


Hi,
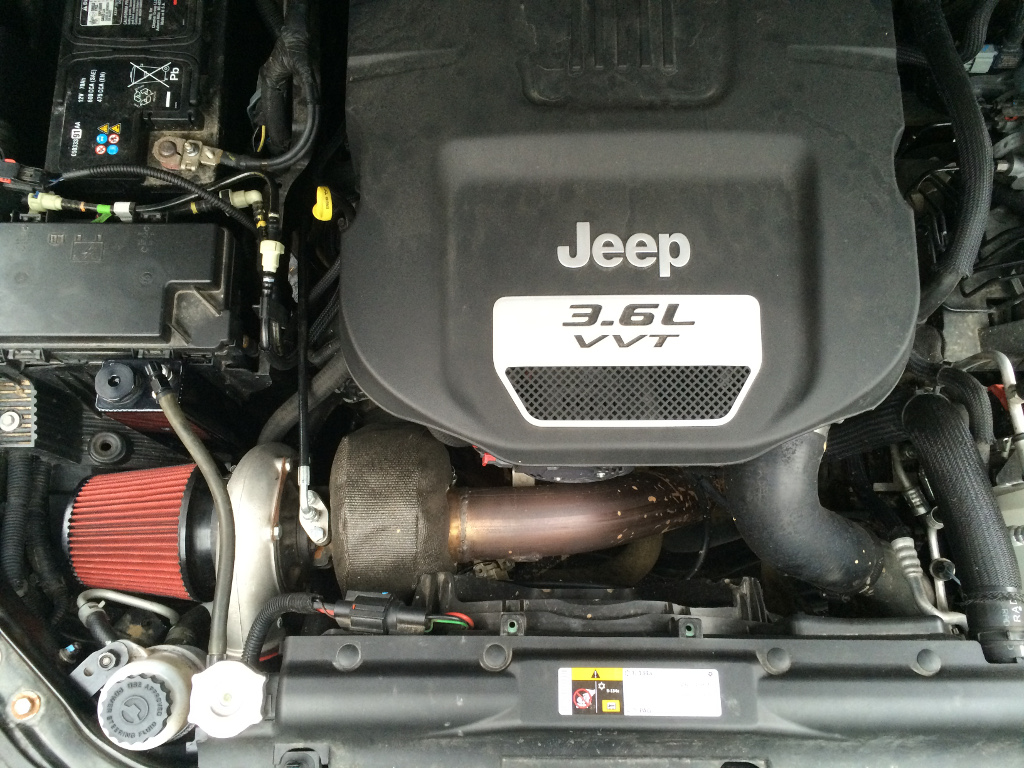
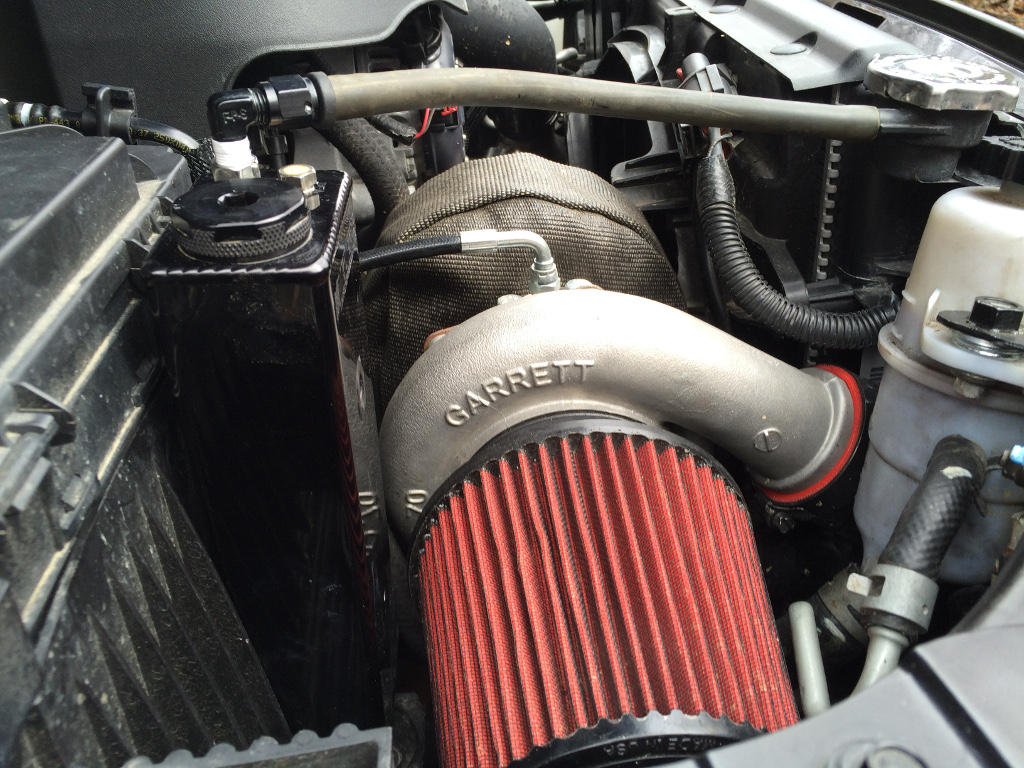
On Friday i went to dunes with my JK . It was fun, but i experience a high vibration on road. Check the wheel balance all ok. Check the shaft (transfer shaft bolt were loose ) and then i saw this ......


Hi,
On Friday i went to dunes with my JK . It was fun, but i experience a high vibration on road. Check the wheel balance all ok. Check the shaft (transfer shaft bolt were loose ) and then i saw this ......
Ugh. are you sure all your pipes are geometrically correct? i remember it was tight getting everything in.Originally Posted by jeepsking

and this is a side question, as its answer has no bearing. how hard were you wheeling? high speed? big twist? did you hear a "CLUNG" sound at any point?
Hi Ross,
This pipe is rigid, so i don't think i can change any angle. Yes as i stated before that i drive extremely off road with high speed (60mph). I don't blame PD they have done an excellent work putting a turbo kit in a pentastar JK , but i hope that they revise the routing of driver side manifold.
That actually makes a lot of sense now that I think about it. There's no clearance issue between that pipe and the front driveshaft with a stock track bar. But if you use a longer track bar with a suspension lift to re-center the front axle, that will push the front axle closer to the pipe (toward passenger side) when the suspension is compressed to the point of normal stock ride height (when the track bar is level).
The stock suspension setup has the trackbar level when at normal ride height, and the axle swings *away* from that pipe (toward the driver side) if the suspension either compresses or extends from normal ride height.
I think the solution will be to extend the trackbar mounts (frame mount downward and/or axle mount upward) so that you can use a shorter track bar that is closer to being level when at normal ride height.
Hi Jeff,
I have 2" lift JKS with teraflex adjustable front track bar. What should i do now ?
Paging Dr. Pickles!
LOL. how clutch is that guy? you know he's got the answer.
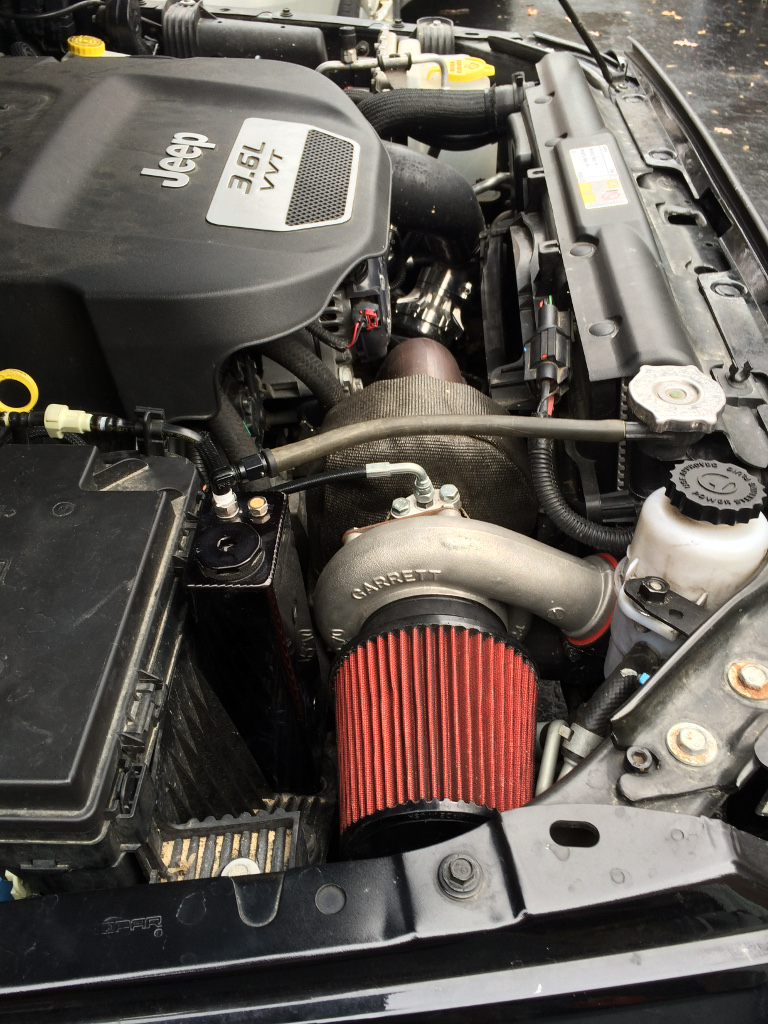
Time to solve the problem of the vulnerable coolant reservoir. Just as a reminder, the Prodigy instructions currently have you mount the reservoir behind the front bumper:
Dan from Prodigy shared a picture of an alternate location that an install shop thought of. I liked it so much, that I relocated mine similarly:
I really like this location better. It's not exposed to trail damage. The vent is not exposed to road spray, rainwater, puddles, etc. The cap is easy to access for checking fluid level and refilling. The reservoir is level with the top of the radiator with a short hose connecting them. This is basically the ideal location for the reservoir.
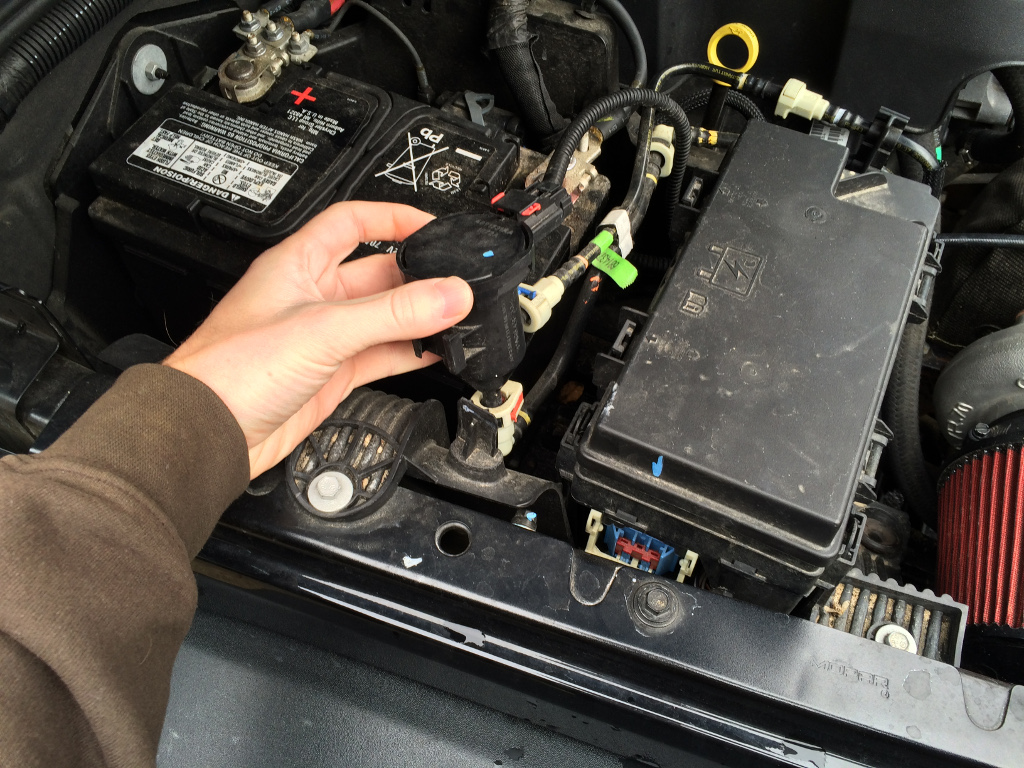
The reservoir has threaded holes that allow us to bolt it to the plastic wall, with a bolt coming from the other side of that wall. That means we need to get the TIPM (Totally Integrated Power Module) out of the way to access the other side of the wall.
Start by moving whatever this thing is. It just slides up off its mounting tab, then push it aside:
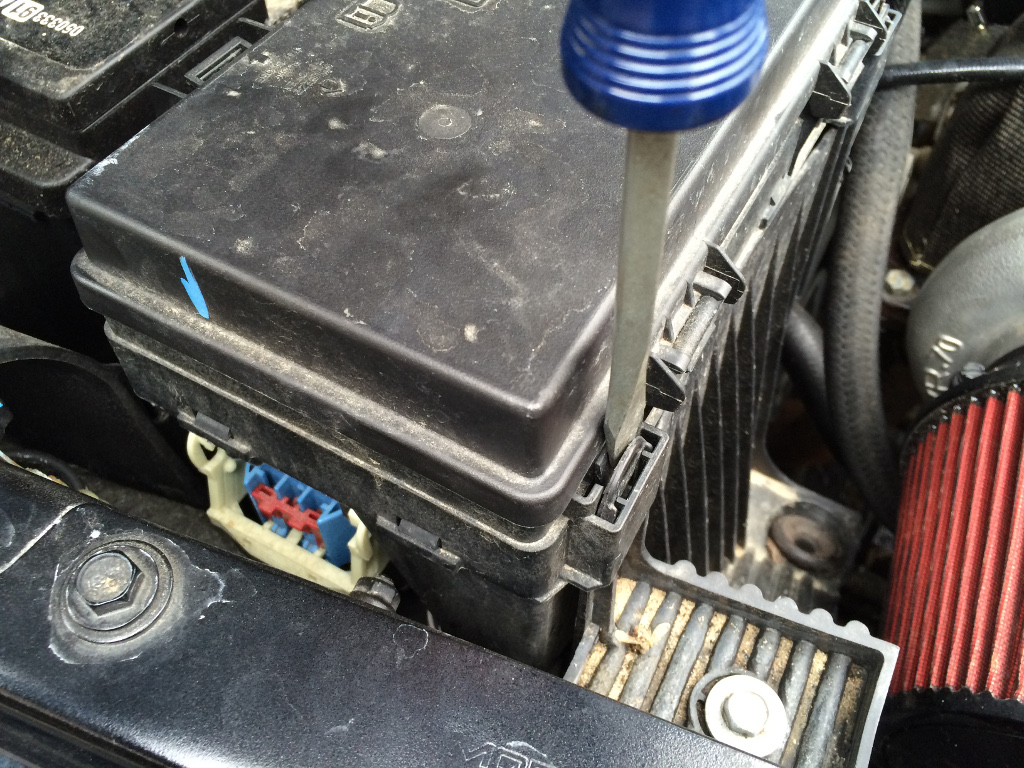
That will give us a little more room to push the TIPM aside.
Next, remove the TIPM. Use a flat blade screwdriver to unlatch the 4 mounting tabs. You'll have to lift up on the TIPM at each corner as you unlatch to ensure that it fully disengages:
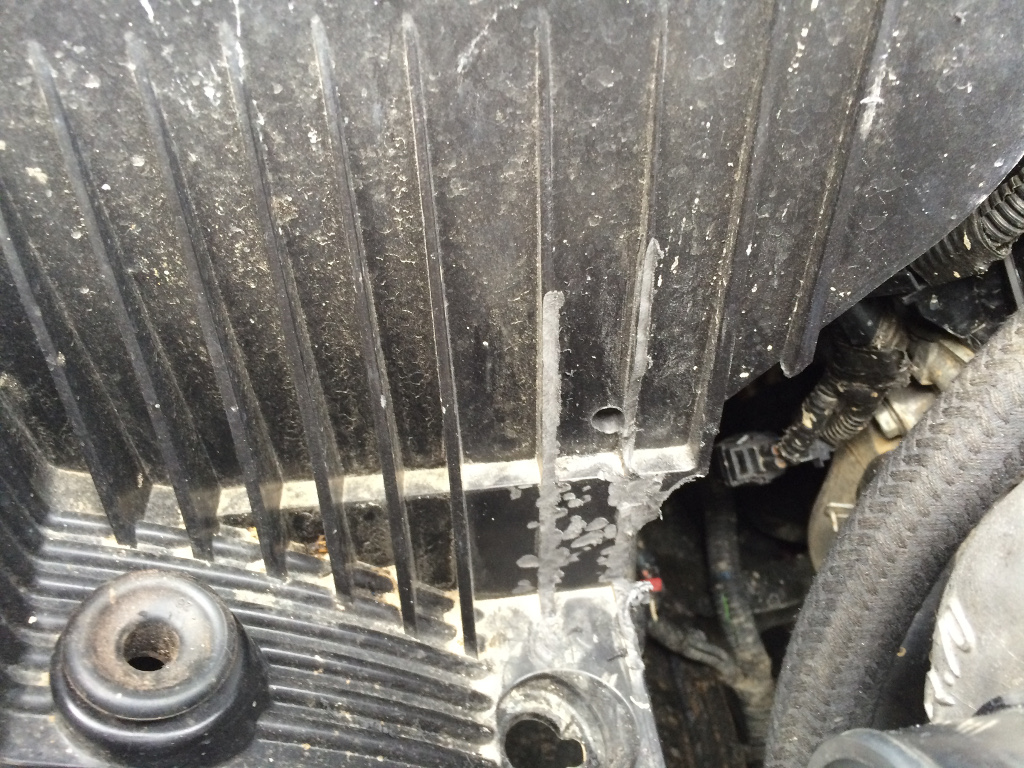
These plastic ribs need to be trimmed so that the reservoir can sit as low and as close to the wall as possible:
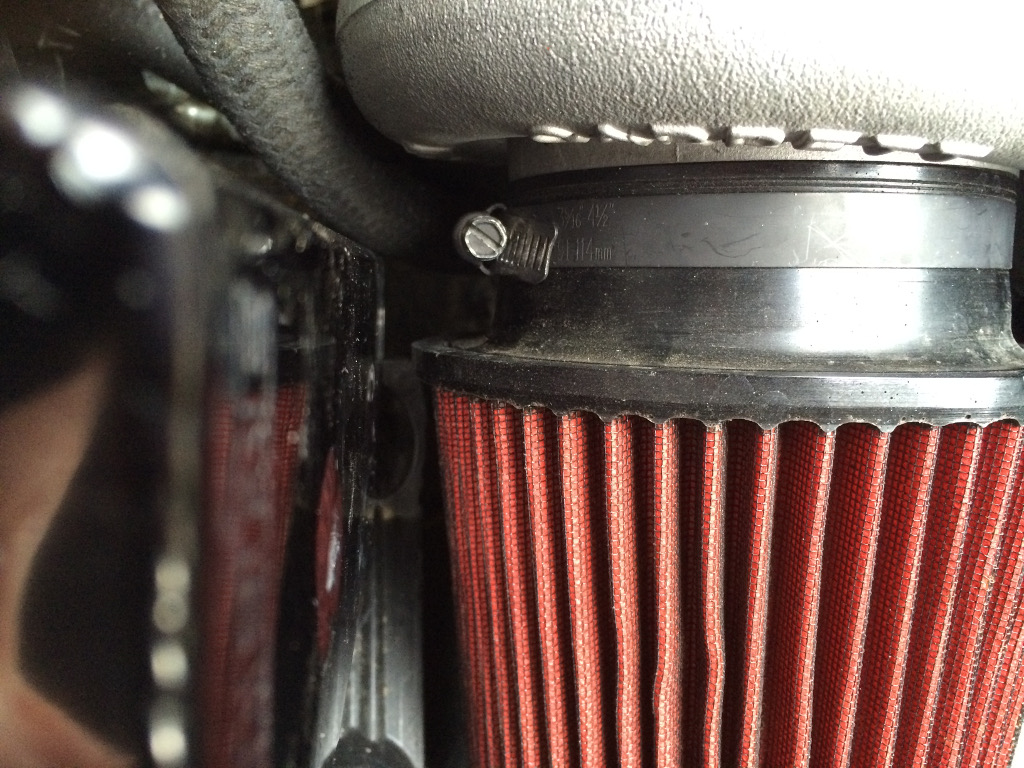
I just used a Dremel with a sanding drum. Remove the air filter to get some more working room:
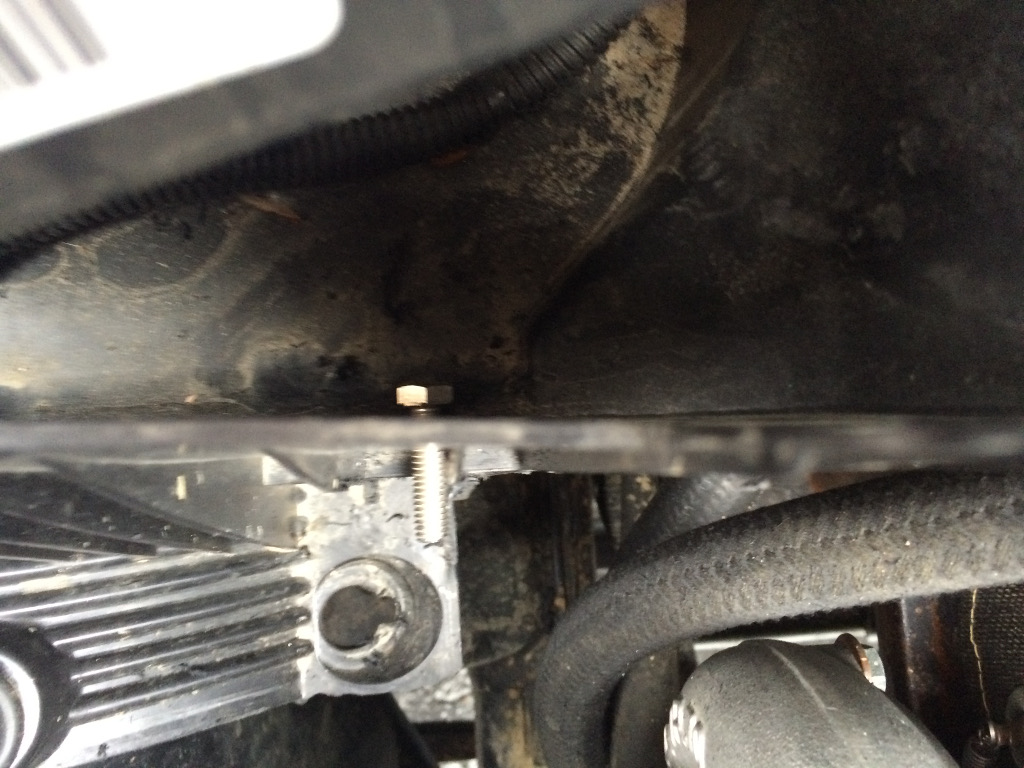
Once you trim enough plastic out of the way, hold the reservoir in place while using a 1/4 inch drill bit to mark where you'll drill a hole through the plastic wall:
NOTE: Only the lower mounting hole is being used. There's no space for a bolt head to fit on the other side of the plastic wall in the location of the upper mounting hole.
The fun part is drilling the hole. There's not enough space to get a hand-held drill in there, especially with the turbo in place. I used the Dremel again. A small drill bit was used to start the hole, then I used what I believe is called a "cone burr" ( narrow cone-shaped grinding/filing bit) to slowly/carefully ream the hole out larger until my bolt just barely fit through:
That's a 5/16 inch diameter, 18 pitch thread bolt. I learned the hard way that the mounting hole on the reservoir is NOT threaded all the way through. I started with a 1-1/4 inch long bolt, but bottomed it out on the threads of the reservoir before I could tighten it down. I ended up cutting about 1/4 inch off the bolt. To be safe, I would probably buy a 3/4-inch long bolt if I were doing this again.
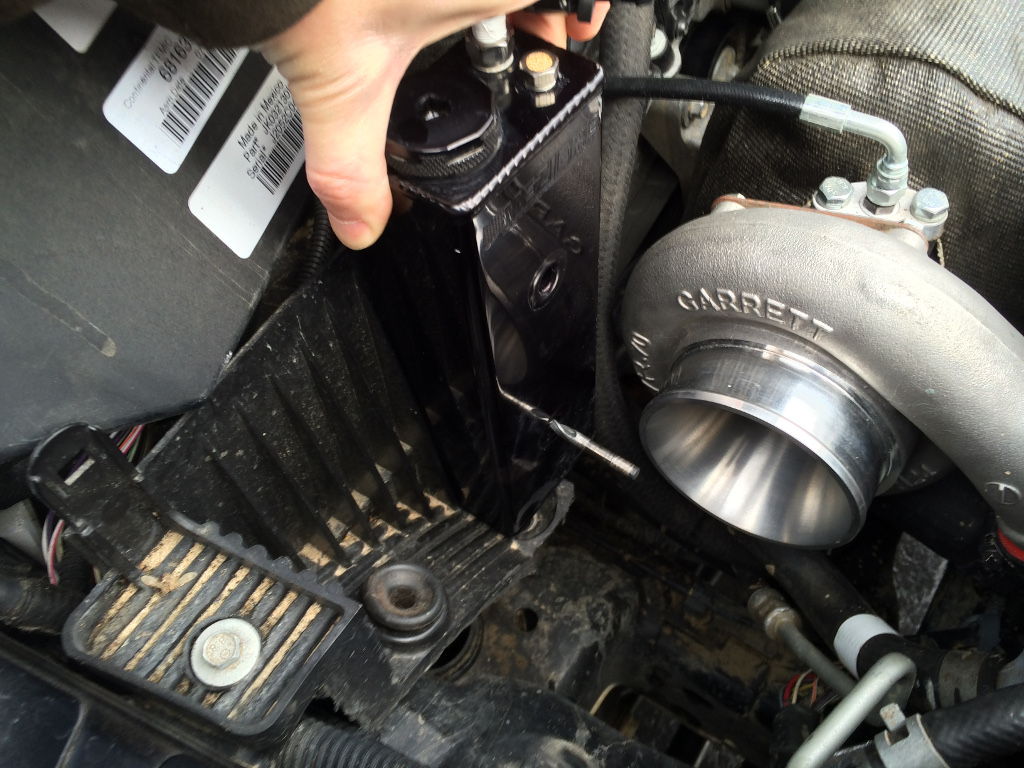
Mount the reservoir with that bolt and tighten it down good. It's very solid with only one bolt holding it:
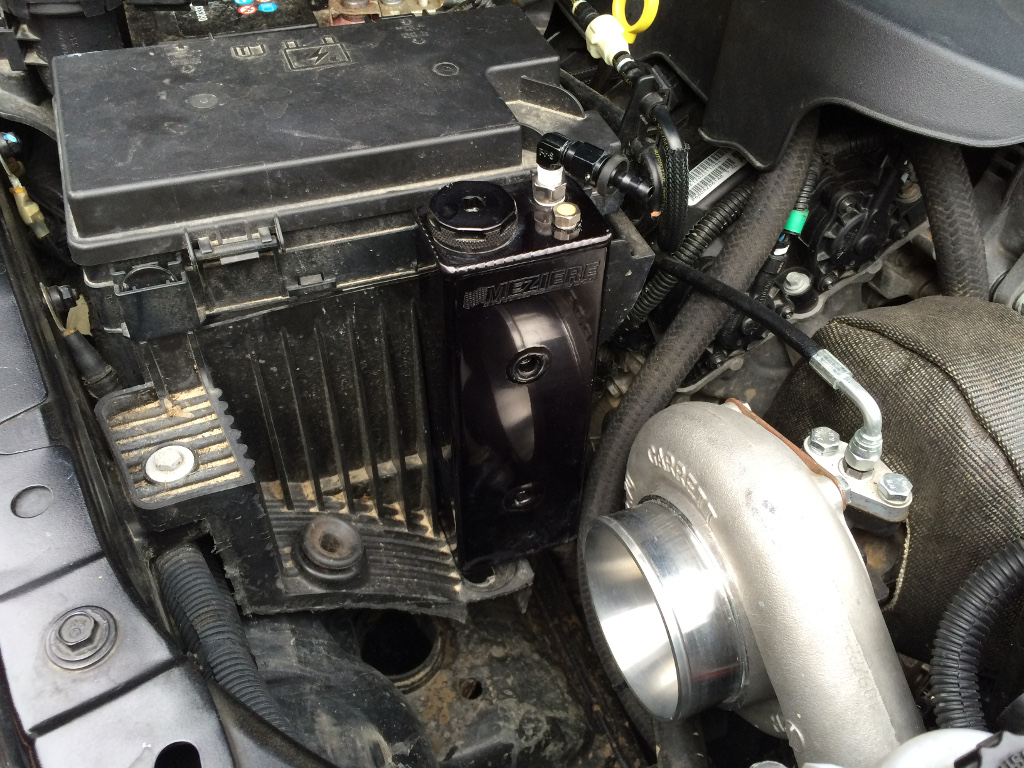
Then you just need to cut an appropriate length of hose from the original coolant reservoir hose, hook it up to the radiator, install the TIPM, and install that other thing that was move aside at the beginning:
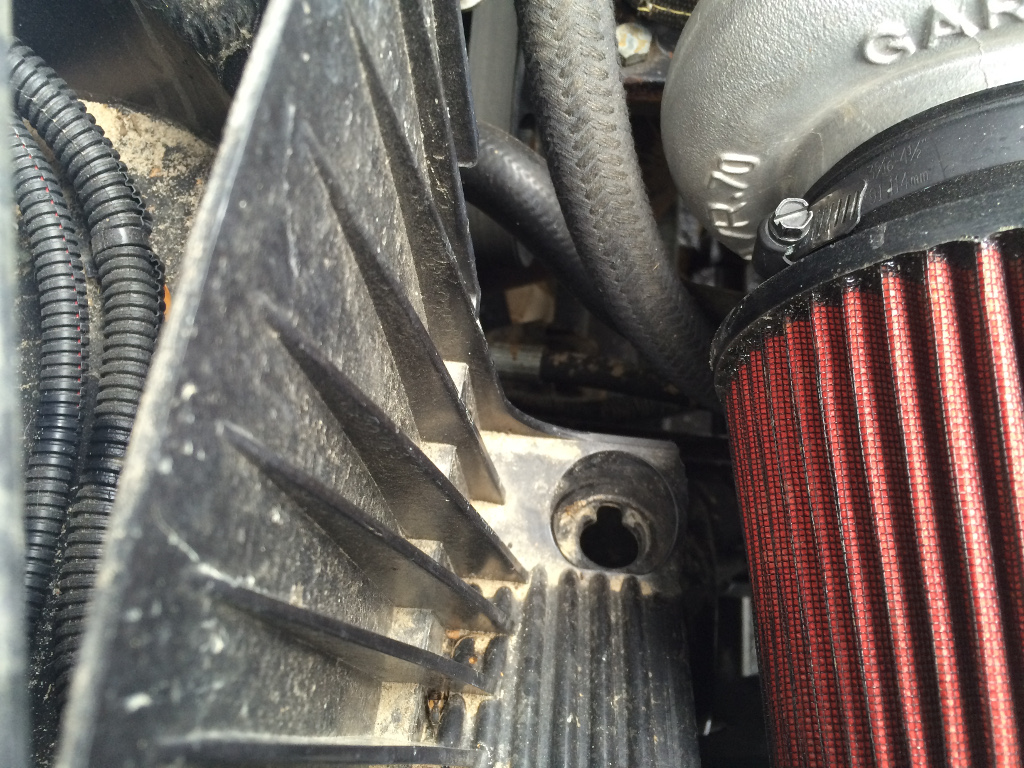
There's plenty of clearance from the turbo and air filter:
And the final overall view of my install with this latest change:
Last edited by UselessPickles; 11-25-2014 at 10:19 PM.
Thanks for the compliment. The idea is to share the infos so whoever face it know's what to do.
Jeff, thanks again and i will adjust the track bar as you said cause i already have one and not tends to get the mount (which is a better solution as u said).
To be honest i thought about the same location of the recovery tank because i have AEV bumper which u can't put the tank on it .but didn't had the time to relocate.
For the time being my front drive shaft is out for trouble shooting (no vibration now ) and the shaft looks ok (i guess ) let see what happens next.
The cause of vibration
^^^Time for an upgrade.
 Posting Permissions

 Reply With Quote


Connect With Us