


The water sound behind the dash likely has nothing at all to do with the turbo setup. Its been an "issue" Chrysler has been looking at for a while.


The water sound behind the dash likely has nothing at all to do with the turbo setup. Its been an "issue" Chrysler has been looking at for a while.
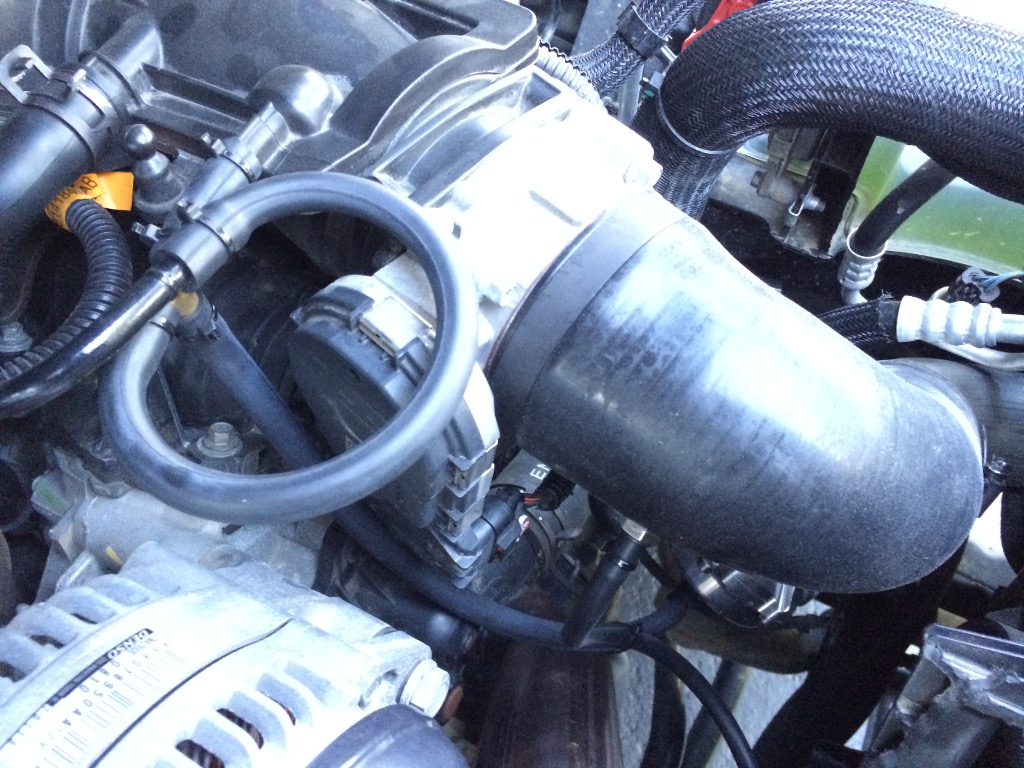
That's the breather for the PCV system, which connects to the driver-side valve cover. This is my own temporary setup because the kit at one point had no solution for filtering the air that gets sucked in there (fresh air enters there to replace the oily air that is sucked through the PCV valve/hose into the intake manifold). Prodigy has since started including a breather filter that fits right into the original hose that used to connect to the air filter box. I hacked up my original hoses/pipes for the PCV system to experiment with some alternative setups. I actually have new replacements on order at a dealer so I can finalize my PCV setup and start using the new breather filter from Prodigy.Originally Posted by NOLAjeeper

I didn't know there was more than one way that the MAP sensor could physically be hooked up. Please share details of how it can be accidentally hooked up wrong. We'll try not to tease you too much if it was a really stupid mistake
That's expected right after installing the turbo kit. There's probably air in the system from draining/refilling the cooling system. It should work itself out in a few days. You should check the coolant level in the radiator and the reservoir when the engine is cold and add more coolant if necessary.
In this case for me, it was clearly due to the heater hose connections allowing air into the system. All the clamps were a bit loose (because the hoses had compressed under the clamps over time), and the problem worked itself out after I tightened up all the clamps. I suspect NOLA's water sound issues will now disappear within a couple days. If so, then that's more evidence that the worm-gear clamps are not ideal for this application.
If you have the water sounds AND no/low heat blowing out of some of the vents, then you have a clogged heater core that needs to be replaced. This is a known issue caused by casting sand leftover in some engine blocks. This is covered under warranty. Another possible cause for this is mixing HOAT and OAT coolant, which turns into very nasty/gooey stuff and would NOT be covered under warranty.
If you get the water sound with every cold start, but heat works fine... check your coolant level (radiator AND reservoir). Burp air out of the system and top off the radiator.
If the problem is now permanently fixed, then you just had some stubborn air in the system.
If the total amount of coolant remains stable after you top it off, but the problem keeps coming back, then air is being introduced into the system somehow every time you drive, so you probably have a slightly loose seal somewhere (in my case, slightly loose hose clamps). Worst case would be a bad head gasket allowing some combustion gasses into the cooling system, but that would likely cause more severe problems.
If the total amount of coolant is not stable (losing coolant), then you either have a coolant leak somewhere, or a bad head gasket that is allowing coolant into the cylinders, which is being burned off.
The extension adapter provided by PD for the MAP SENSOR. I am referring to the connection between the extension adapter and the engine harness adapter which can be easily miss installed the slot looks identical either way.
Ok my impression about the kit:
It's good but i have an issues regarding the initial pick up. ie: full throttle at low rpm below 2000 will easily lend to a cut off in power theb gradually it starts boosting. Even once it reaches 4500 i can feel a power loss at 3rd gear Jeff can you confirm if it happen to you also since you have a manual transmission.? I used an app called dash command for data logging and discovered that the timing has been set to +12 for most of the rpm's and gears.
My boost is reading 8.1 psi. I didn't install the AEM WIDE BAND yet so i can't determine the fuel ratio.
A few possibilities I can think of:
1) You don't have the latest tune improvements that Jessee and I have been testing. We received the updates as custom tunes. I don't know if the improvements have been pushed out to the official Prodigy tune on Diablosport's servers yet. The latest tune has big improvements in the lower RPM area.
2) I have found that the turbo does not respond well to sudden full throttle, especially at low rpms. The engine seems to bog down a bit with sudden full throttle. From low rpms, instead of stomping on the throttle, try a smooth transition to full throttle. You can still quickly transition to full throttle, but just don't suddenly stomp on it. At higher rpms (4000+), it will respond more quickly to sudden full throttle, but smooth throttle transitions will always give you the best results because it allows for the turbo to keep up with your demands. I believe this is just a normal characteristic of a relatively large turbo. It doesn't bother me, because I prefer smooth acceleration transitions anyway (your drivetrain probably prefers acceleration transitions as well).
3) The turbo can't really produce a lot of boost until somewhere above 2500 rpm. 1st gear accelerates quite well below 2500 rpm, but if you are in a higher gear, then you'll always get the best results from downshifting to get rpms above 2500 rpm if you really want to accelerate. That's one way the automatic transmission would be better. If you use a lot of throttle with the auto transmission, it will downshift. The manual transmission gives us the opportunity to be lazy and wish we could just accelerate quickly from lower rpms
I think I need a more detailed explanation of this to understand it. Are you talking about driving steadily in 3rd gear at 4500 rpm, then stomping on the throttle? If so, then there will be an initial lack of power as the turbo spools up. This is boost lag.
Now we've got 3 people making about 8.0-8.2 psi boost. Jessee increasingly appears to be the outlier with 9 psi boost! This really makes me want to crank the boost up to 9 psi with a manual boost controller to experience some extra fun
I made my data log and ill send it to PD for the custom tune. My only concern for low RPM because i do extreme dune bashing with almost 15 jeepers in the desert. We climp high dunes. We sometimes race down to top as you posted couple pages back. This requires initial pick up (i am not talking about turbo spool but the vehicle tends to cut till it reach 2300 then it respond then the turbo spool.
Regarding 3rd gear. Once i put full throttle while in seconds and shift to 3rd till it reach 4500 here where i feel the loos of power then it come back at 5800 ( the turbo sound different at that stage).
This Friday i am going to the dunes to try it. Might shoot a video
I got a nice data log of full throttle boost in 2nd gear today and made a chart from the data:
Interestingly, I don't even hit 8 psi in 2nd gear. I do hit 8 psi (barely) in 3rd gear. It's normal to not get as much boost in lower gears where engine speed is increasing quickly and the engine is under less load. I think this concept might possibly explain why I'm getting a bit less boost than NOLA and jeepsking: I have a bare-bones 2-door with tiny stock wheels/tires (very light, low rotational inertia of tires/wheels), which would result in less engine load and quicker increases in engine speed as compared to a heavier jeep with bigger tires.
UPDATE: I had an exhaust leak causing a small loss of boost. Details later in the thread here: http://jeeplab.com/showthread.php?13...ull=1#post3705
New boost curve:

Last edited by UselessPickles; 01-10-2015 at 07:10 PM.
Ok... time to finish documenting the stage 2 upgrade. I left off with a new power steering hose installed and a new/relocated coolant reservoir.
I didn't get a lot of pictures, but most of it is quite straightforward.
* Remove the wastegate, replace the hose fitting with a different type of hose fitting, and replace the spring with a new spring. Two people are required to replace the spring, because you need to have someone hold the wastegate together while you remove all the bolts holding it together. Same for putting it back together with the new spring. Re-install the wastegate.
* Remove the hose fitting from the turbo compressor outlet and replace it with a plug (a grub screw). I used plumber's thread tape here to prevent leaks. This step is required because the wastegate will no longer be getting its boost source from the turbo compressor outlet (details later).
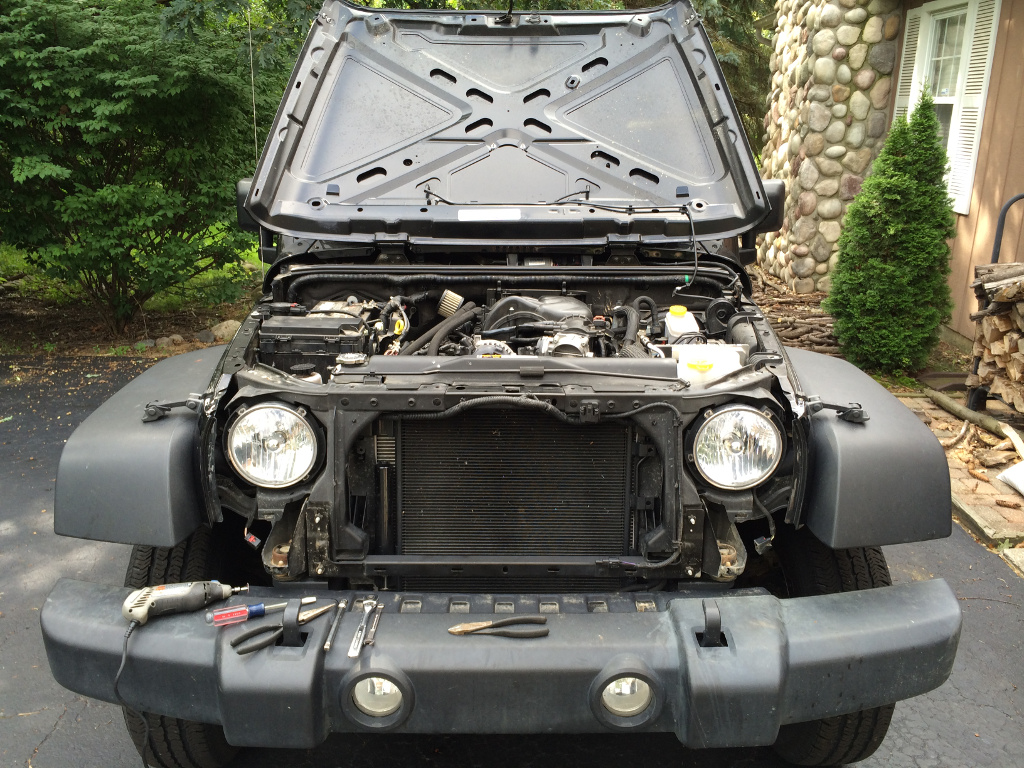
The intercooler install is the fun part. Remove the grill. If I have to tell you how to remove it, then you shouldn't be attempting the turbo install
I used blocks of scrap wood under the intercooler to help get it into its proper position before marking and drilling holes to mount it. It's a tight fit, but it does not require any trimming of the grill.
NOTE: I have a manual transmission, so I didn't have to deal with replacing the transmission cooler. That's an extra step (and cost) for anyone with an automatic trans.
Here it is propped up by a block of wood for a test fit:
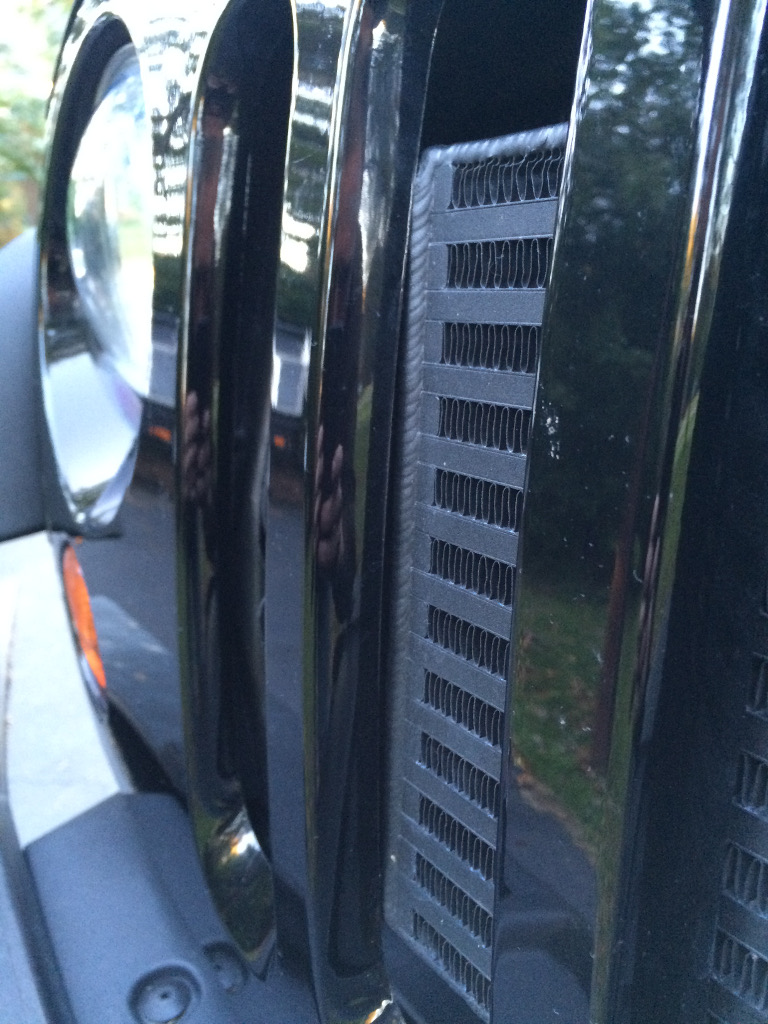
And some details of the final result to give you an idea of how it should be positioned...
It touches the back side of the grill in a few spots:
This plastic here needs to be trimmed to make room for the intercooler hose (both sides). A Dremel with a routing bit was used for the rough cut, then a sanding drum bit to clean it up:
The instructions say to just completely remove the thin flexible air deflector material in this area, but I chose to try to keep as much of it as possible. An xacto knife cut through that material quite easily.
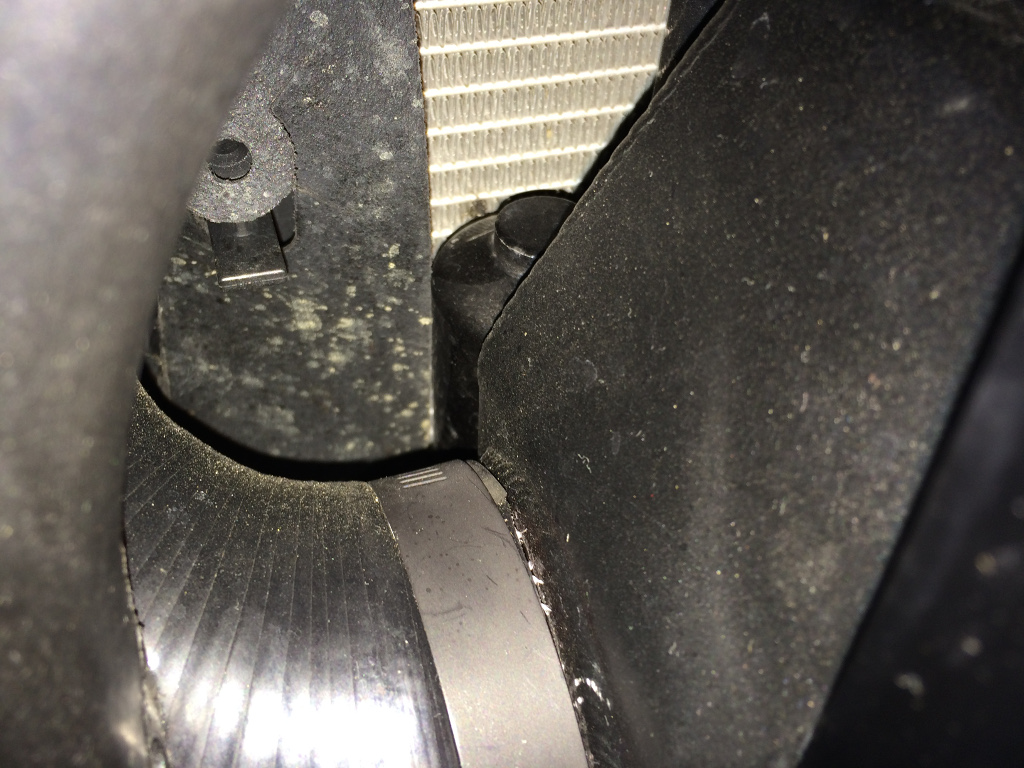
And here you can see that cylinder that's part of the A/C condenser, right behind the intercooler:
I had to gently, but firmly, push on that cylinder to bend it slightly backward at its base. This reduced the amount of pressure it applies on the intercooler against the grill.
Once you have test fitted the intercooler and trimmed the plastic, I got the best results from mounting the intercooler before hooking up any hoses. This is how I got my intercooler perfectly centered. Instructions have you connect the intercooler to the turbo before mounting it, but I found this made it extremely difficult to get the intercooler lined up with the holes to get the bolts in, and impossible to get it centered.
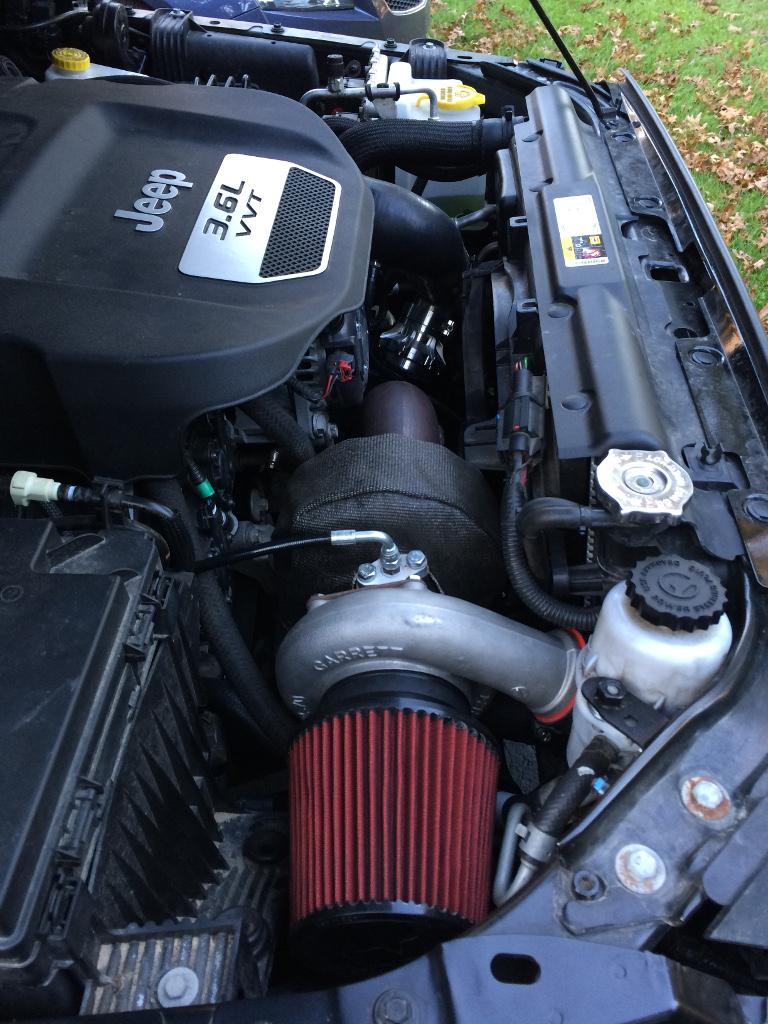
To connect the turbo to the intercooler, you need to slightly loosen the compressor housing bolts so that the compressor housing can rotate. The power steering reservoir also needs to be un-mounted so that it can be moved out of the way. It's easiest of you also remove the air filter so you have more room to push the power steering reservoir aside.
The silicone elbow is fed in from the engine bay through to the grill area, and connected to the intercooler. It's tight in there, so be prepared for some frustration. A small amount of dish soap helps the silicon hose slip onto the intercooler. Then the compressor housing is rotated forward, popping the silicon elbow onto it. The end result looks like this:
Before you get too far ahead, double-check the clearance between the intercooler hose and the trimmed plastic. I had to remove the silicone elbow and do some more trimming.
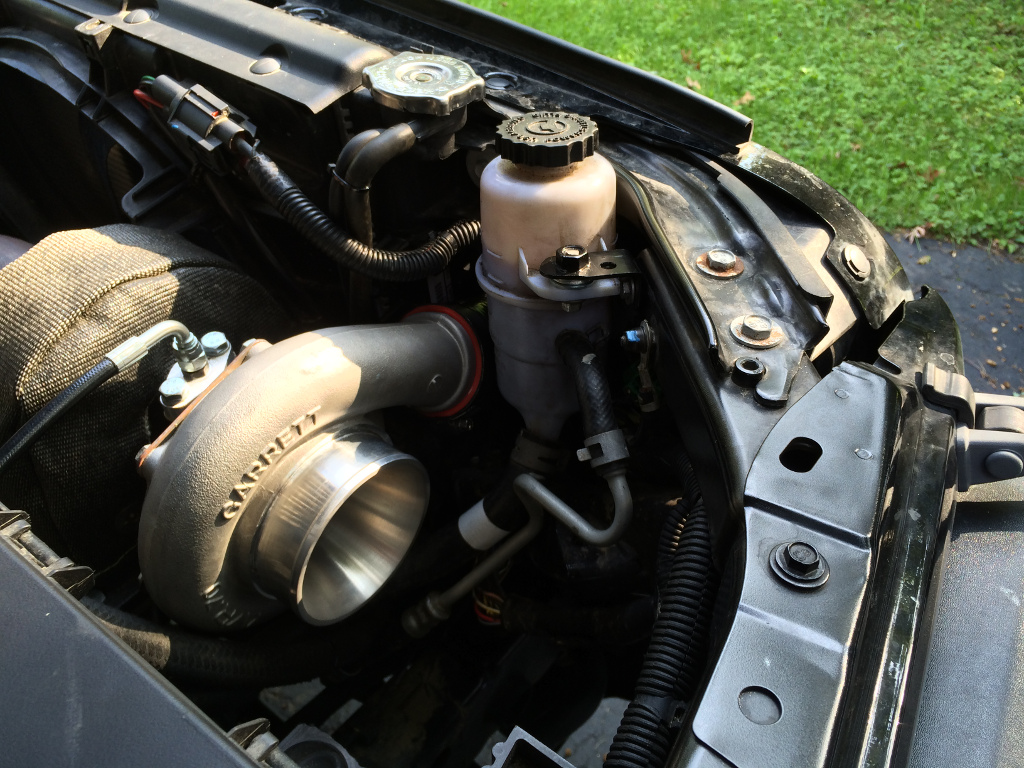
The power steering reservoir doesn't quite fit in its original location. You need to remove the mounting bracket and trim a couple locating tabs off of it (Dremel cut-off wheel worked well) so that the mounting bracket can be rotated upside down and slightly tilted like this:
And a plastic rib on the reservoir's mounting tab needs to be trimmed a bit so that it can be mounted under the bracket instead of on top:
I added a few washers to drop the reservoir a bit lower. Without the washers, the hood would contact the reservoir's cap when closed.
The other side of the intercooler is a bit easier to hook up. A silicone elbow is similarly fed through from inside the engine bay to connect to the intercooler. Then the charge pipe (with BOV) is connected to that elbow. There's two A/C lines that will need to be gently bent to make room for the pipe:
The last silicone elbow connecting to the throttle body is different from that of the stage 1 kit, so you'll have to transfer the IAT sensor over to the new part (if upgrading from stage 1).
All that remains is to hook up the vacuum/boost lines to the wastegate and BOV. I'll save that for another day.
Last edited by UselessPickles; 11-19-2014 at 11:59 PM.
I guess I'll just finish up now, since I've already fully documented my wastegate and BOV setup elsewhere. Just some copy, paste, and edit work...
So as I've already discussed in a few other places on JeepLab's forum, I did not follow Prodigy's design for the BOV and wastegate lines. Go back to this post to see some details I already covered about where the wastegate line gets connected with stage 2, and where it really should get connected: http://jeeplab.com/showthread.php?14...ull=1#post2740
Quick review...
This link has cool info and pictures to explain stuff: http://www.miataturbo.net/diy-turbo-...eed-ebc-47532/
The wastegate should be connected to position "B", between the intercooler and the throttle body.
Stage 1 has the wastegate connected to position "A". Since stage 1 has no intercooler, this is fine. Without an intercooler, there is no significant difference in pressure measured from position "A" or position "B".
The official instructions for stage 2 have you connect the wastegate to position "C". This post explains why position "C" is bad: http://www.miataturbo.net/diy-turbo-...32/#post574757
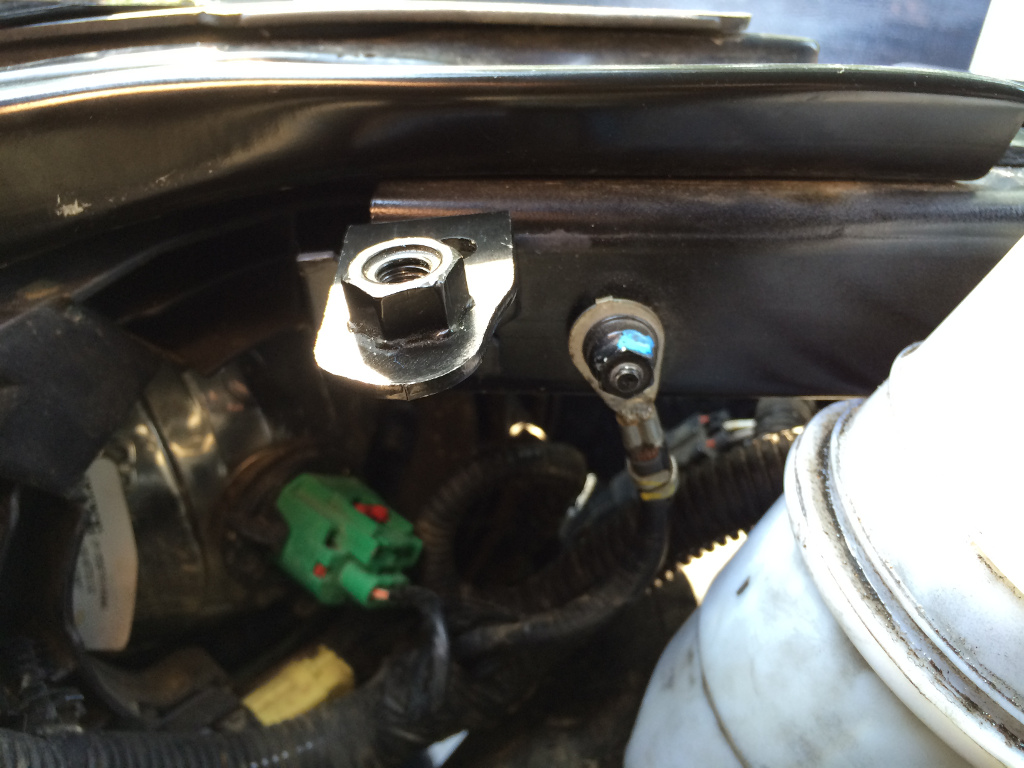
For my install, I used one of these to add a boost source at position "B" for my wastegate:
http://www.atpturbo.com/mm5/merchant...egory_Code=BCS
Here's the boost source for my waste gate:
I zip-tied the waste gate line to the BOV line, and at two points on the radiator fan shroud. One of the points is simply tied to an existing wire that is secured to the fan shroud. I had to drill a small hole through an "arm" of the fan shroud closer to the BOV to add a zip tie there and hold the wastegate line away from the exhaust down pipe.
And here's how my BOV line is teed into an existing vacuum source on the intake manifold:
And some pictures of the final result:
They should just make this thread their install manual.
 Posting Permissions

 Reply With Quote


Connect With Us