


Here's my quick right-up for anyone that has AMP powersteps and wants to do this when you take off the doors.
(I'm borrowing pics from all over the Internet so I don't have to go back out and take pics, please forgive me...)
Total install time after you have the parts is maybe 15 minutes.
Parts/tools required:
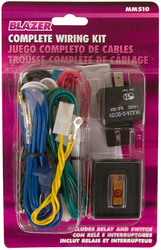
1) Electrical Relay for each footwell from auto parts store. Can be a 4 prong or 5 prong. At O'Reilly auto parts, they actually had a nice little packaged kit for $12 that included a 4 prong relay plus a by-pass switch, plus a number of different wires with the connectors on them already that slide on to the posts of the relay, have an end to attach to ground post, etc. (Blazer International - Relay Wiring Kit Part # MM510)
2) If you didn't purchase the relay kit with wires and instead just a basic relay, then obviously you'll need some electrical wire and a way to attach them to the four posts of the relay. You could solder them on, or buy wires with the connectors on them.
3) Qty 4 or 6 - Wire taps - to tap into the hot of the LED lights, and to connect the grounds together more easily. (Probably the red size is best, the blue's seem a little too big for the gauge wire used.) Depending on how you want to attach the AMP Powerstep door sensor wire, you might want to just tap it, or put a new connector on the end to connect to the posts of the relay (ie, this might be wire taps #5 and #6 if you chose.)
4) Screw driver, ratchet, wire cutter.
Install
1) Remove the AMP Powerstep fuse if you still have it in. You don't need the steps extending on you while your working incase you prematurely ground the wire.
2) Located the LED lights under the footwell.
3) Place a tap into the yellow cable shown in the picture (this is the hot wire leading to the primary LED light.)
4) Mount the relay on the 2nd ground post in the footwell area with the posts of the relay pointing up so they stay out of the way.
5) Place a wire on the 1st ground post in the footwell.
6) Connect the hot wire from the LED light that you tapped to post #86 on your relay (all relays seem to have these numbers on them.)
7) Connect the ground wire on to post #85 of the relay.
8) Connect another wire on to post #30 of the relay and tap this on to the ground wire coming off post #85 (you could run this to the ground post in the footwell as well, but why run two wires, this way it stays nice and clean.)
9) Connect the "door sensor" wire from the AMP Research powerstep to post #87 of the relay. You could just tap the AMP door sensor wire that you already have into the door wire of the Jeep, but that'll probably get goofy when you put the doors on. I decided to simply remove the tap from the Jeep's door wiring for now and put a new end on it to connect to the post of the relay. (AMP includes a nice tap device that is a screw-on, so you can simply un-screw it, leaving the original tap on the main wire but pulling of their wire so you can re-attach it at any later date.)
10) Re-insert the AMP Research fuse.
11) Either push the keyfob unlock button, or turn on the interior dome lights via the switch on the turn signal stalk and see if the steps perform as expected.
Install Notes / Less Learned
- One thing I found helpful was to use a circuit tester at various points to confirm if the relay was working correctly ($9 part at auto store.)
- The el-cheapo relays from the auto store make a goofy vibrating noise when the LED lights dim at the end of their timer. Since a relay has a magnet in it with a spring, my assumption is that the magnet goes a little crazy as the voltage drops to zero. I think I'm going to research for either a solid state relay unit that is silent, or another mechanical relay that can better handle the decreasing voltage during dimming. Fortunately the powersteps still perform just fine as they have a built in delay, so it's not like they sit there and retract/extend/retract/extend until the voltage is at zero.
- I need to find a better way to deal with different wire taps for when the doors are on vs. being off. I could just leave the tap on the LED light like I have, however, that means both steps will extend when any door is open, whereas AMP has it setup so only the steps on the side of the door that is opened will extend/retract. For now though, since it's the start of summer, I don't really care as I plan on trying to leave the doors off for as long as possible
If you try this and have any questions, just ask. Probably not the best write-up in the world, and it was my first, but at least it is enough info to point you in the right direction.


 Reply With Quote
Connect With Us