Close

Page 5 of 11 FirstFirst ... 34567 ... LastLast
Results 41 to 50 of 109
  1. #41
    Click image for larger version. 

Name:	iphone 362.jpg 
Views:	0 
Size:	86.6 KB 
ID:	1011Click image for larger version. 

Name:	iphone 363.jpg 
Views:	0 
Size:	92.4 KB 
ID:	1012Next just undo the electric cooling fan by undoing 2 (8mm) bolts and unplug the harness at the top passenger side of the fan. Then just lift it straight up and out.

  2. #42
    Next up you have to remove the power steering pump by taking the tension off the belt using the factory tensioner. You reuse your stock belt according to RIPP unless you have more than 40,000 miles on it. Next you remove the factory belt tensioning system by taking 2 (13mm) bolts. This exposes a cover plate that you also remove via 1 (16mm) bolt. Oh and some access would have been a lot more difficult if I didn't have flat flares and a stubby bumper, a lot of this was easier going in from the passenger side front fender.
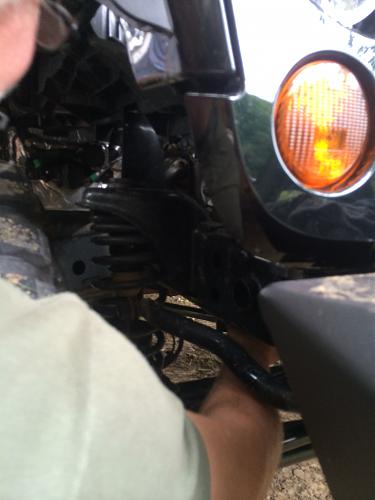
 Click image for larger version. 

Name:	iphone 364.jpg 
Views:	0 
Size:	87.1 KB 
ID:	1015Click image for larger version. 

Name:	iphone 365.jpg 
Views:	0 
Size:	84.4 KB 
ID:	1016Click image for larger version. 

Name:	iphone 366.jpg 
Views:	2 
Size:	79.7 KB 
ID:	1017

  3. #43
    cool install. Is your truck a bullet now?

  4. #44
    There is a good bit of difference from stock once you hit 3k RPMs

  5. #45
    Quote Originally Posted by Deola View Post
    There is a good bit of difference from stock once you hit 3k RPMs
    Ahhhhhhhhhh!

  6. #46
    Click image for larger version. 

Name:	iphone 367.jpg 
Views:	0 
Size:	87.9 KB 
ID:	1068Click image for larger version. 

Name:	iphone 368.jpg 
Views:	0 
Size:	87.2 KB 
ID:	1069Click image for larger version. 

Name:	iphone 369.jpg 
Views:	0 
Size:	97.2 KB 
ID:	1070Now you install the supplied steering pump spacer/ relocation bracket. You mount the spacer directly to the engine block where the power steering pump was relocated with the supplied (5/16) Allen head bolts. They should sit flush into the supplied bracket. RIPP advises to torque them to 18 lbs. The larger of the two brackets went in fine, but the smaller ones threads pulled out almost instantly when I began to install it. We had to spend some time re-threading it, once that was done and we seated the threads better the install could continue.

  7. #47
    As you can see its pretty tight quarters. Next you just reinstall the power steering pump into your new brackets. To do this slip the lower pump mount onto stud of lower spacer and thread the nut on lightly to keep it in place and help align the upper holes. While holding the lower metal power steering pump hose use it as your alignment guide and thread upper mounting points, using the factory hardware you pulled earlier. Once everything is aligned you can tighten them all down.

  8. #48
    Next you have to drain all the coolant from the radiator. They suggested using the Petcock on the lower passenger side of the radiator. This was nearly impossible to access so I pulled the lowest coolant hose. Messy but much easier. Make sure you catch the fluid in a clean pan, you will reuse it later.

  9. #49
    Click image for larger version. 

Name:	iphone 370.jpg 
Views:	0 
Size:	87.5 KB 
ID:	1071Click image for larger version. 

Name:	iphone 371.jpg 
Views:	0 
Size:	89.5 KB 
ID:	1072Click image for larger version. 

Name:	iphone 372.jpg 
Views:	0 
Size:	88.2 KB 
ID:	1073Click image for larger version. 

Name:	iphone 373.jpg 
Views:	0 
Size:	79.9 KB 
ID:	1074Click image for larger version. 

Name:	iphone 374.jpg 
Views:	0 
Size:	83.7 KB 
ID:	1075Next you cut that lower hose to make room for the supercharger. You cut it to the first bend...about 3-4 inches are taken off. Then you just reuse the stock clamp and put it back onto the radiator. Then you pull the heater hose directly behind the alternator from the engine block. You cut about 1.5" from the engine side of the hose.

  10. #50
    Next twist the heater tube clockwise towards the alternator, leaving just enough room to reinstall heater hose and clamp. Using a (3/8) socket extension, insert into tube and using controlled steady force, pull upwards until it is in the proper position ( about 1/4" away from the alternator). This makes room for the supercharger bracket installed later. Reinstall heater hose clamp and tighten it up.

Posting Permissions

  • You may not post new threads
  • You may not post replies
  • You may not post attachments
  • You may not edit your posts
  •